User Guide for Installing Intel® Boxed Processor in Your System
The instructions below show how to install Intel® Boxed Processor. They apply for all Intel® processor sockets.
This processor is intended to be professionally installed. Take proper electrostatic discharge (ESD) precautions such as using appropriate ground straps, gloves, and ESD mats.
Follow the instructions listed below on how to install Intel® Boxed Processor.
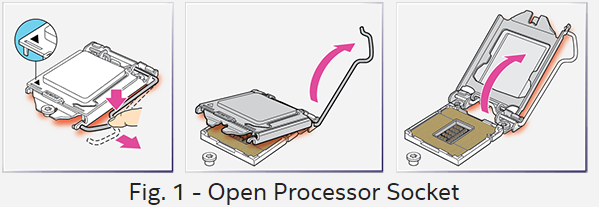
1. Open processor socket
- Find the processor socket, which will be covered with a protective plastic cap. You will see a small arrow on one corner of the plastic socket cover, or on the socket itself. Take note of where this arrow is.
- You will see a small metal lever next to the processor socket. Press down on the lever and pull it gently to the side away from the socket and open the socket tray (fig. 1).
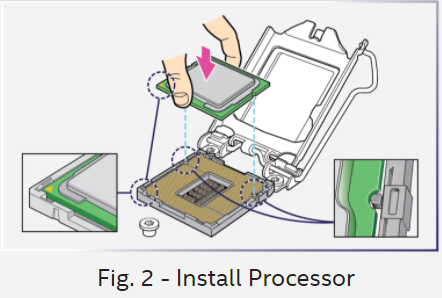
2. Processor Installation
You will see an arrow in one corner of the processor. Line up this arrow with the arrow on the socket and gently place the processor onto the socket (fig. 2).
3. Close Processor Socket
Once the processor has been gently seated, you can lower the retention lever and push it back down into place. Lowering the lever may require some force (fig. 3).

Watch this video to see how to install Intel® Boxed Processor in a system.
| Related topic |
| Processor Installation in an LGA1700 Socket |