Visible to Intel only — GUID: sjd1512186226779
Ixiasoft
1.1. Acronyms and Definitions
1.2. Recommended System Requirements
1.3. Installation Folders
1.4. Boot Flow Overview
1.5. Getting Started
1.6. Enabling the UEFI DXE Phase and the UEFI Shell
1.7. Using the Network Feature Under the UEFI Shell
1.8. Creating your First UEFI Application
1.9. Using Arm* DS-5* Intel® SoC FPGA Edition (For Windows* Only)
1.10. Pit Stop Utility Guide
1.11. Porting HWLIBs to UEFI Guidelines
1.12. Tera Term Installation
1.13. Minicom Installation
1.14. Win32DiskImager Tool Installation
1.15. TFTPd64 By Ph.Jounin Installation
1.16. Revision History of Intel® Arria® 10 SoC UEFI Boot Loader User Guide
1.5.1. Compiling the Hardware Design
1.5.2. Generating the Boot Loader and Device Tree for UEFI Boot Loader
1.5.3. Building the UEFI Boot Loader
1.5.4. Creating an SD Card Image
1.5.5. Creating a QSPI Image
1.5.6. Booting the Board with SD/MMC
1.5.7. Booting the Board with QSPI
1.5.8. Early I/O Release
1.5.9. Booting Linux* Using the UEFI Boot Loader
1.5.10. Debugging an Example Project
1.5.11. UEFI Boot Loader Customization
1.5.12. Enabling Checksum for the FPGA Image
1.5.13. NAND Bad Block Management
Visible to Intel only — GUID: sjd1512186226779
Ixiasoft
1.5.4.2. Creating an SD Card Image on Windows*
This task explains how to write the SD image to the SD card on a Windows*
PC.- Download the pre-built SD card image from here.
- Use the Arria10_Linux_SDCard.tar.gz as a base image and modify the image to boot with UEFI boot loader.
- Extract the compressed SD card image from the compressed archive Arria10_Linux_SDCard.tar.gz using WinZip or or a similar tool to create the Arria10_Linux_SDCard.img file.
- Use the Win32DiskImager to write the image to the SD card. Please refer to the Win32DiskImager Tool Installation instructions for steps to install this tool on your machine.
- Insert the SD card reader into your machine.
- Start Win32DiskImage by selecting Start > All Programs > Win32DiskImager from the Windows* program search or by double-clicking the Win32DiskImager icon on your desktop.
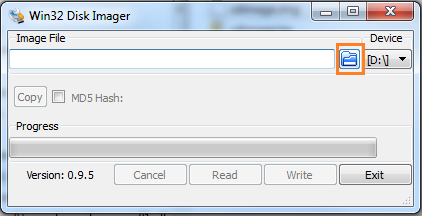
- When the Win32Disk Imager window appears, click the icon highlighted below and browse to <your_SDCard_Image_Directory> .
Figure 38. File Browse in Win32 Disk Imager Dialog Box
- Select Arria10_Linux_SDCard.img and click Open.
- Click Write. The writing process may take some time. Check the Progress bar for status updates.
- After a Done status displays and a Complete dialog box appears, click OK to exit the Complete dialog box.
- Select Exit to close the Win32DiskImager window.