4.7. Running the Endpoint Design Example Application
For link stability when running the design example on the Intel® Stratix® 10 DX FPGA Development Kit or the Intel® Agilex™ F-Series FPGA Development Kit, set the PCIe refclk switch to select the common refclk from the PCIe Edge Connector.
- For the Intel® Stratix® 10 DX FPGA Development Kit, set SW14 to the OFF position to select the common refclk with the PCIe Host.
- For the Intel® Agilex™ F-Series FPGA Development Kit, set SW7.1 to the OFF position to select the common refclk with the PCIe Host.
Here are the test operations you can perform on the P-Tile Avalon® Memory-mapped design example:
| Operations | Required BAR | Supported by P-Tile Avalon® -MM PCIe Design Example |
|---|---|---|
| 0: Link test - 100 writes and reads | 2 | Yes |
| 1: Write memory space | 2 | Yes |
| 2: Read memory space | 2 | Yes |
| 3: Write configuration space | N/A | Yes |
| 4: Read configuration space | N/A | Yes |
| 5: Change BAR | N/A | Yes |
| 6: Change device | N/A | Yes |
| 7: Enable SR-IOV | N/A | No |
| 8: Do a link test for every enabled virtual function belonging to the current device | N/A | No |
| 9: Perform DMA | 0 | Yes |
| 10: Quit program | N/A | Yes |
To run a DMA test:
- Navigate to ./software/user/example under the design example directory.
- Compile the design example application:
$ make
- Run the test:
$ sudo ./intel_fpga_pcie_link_test
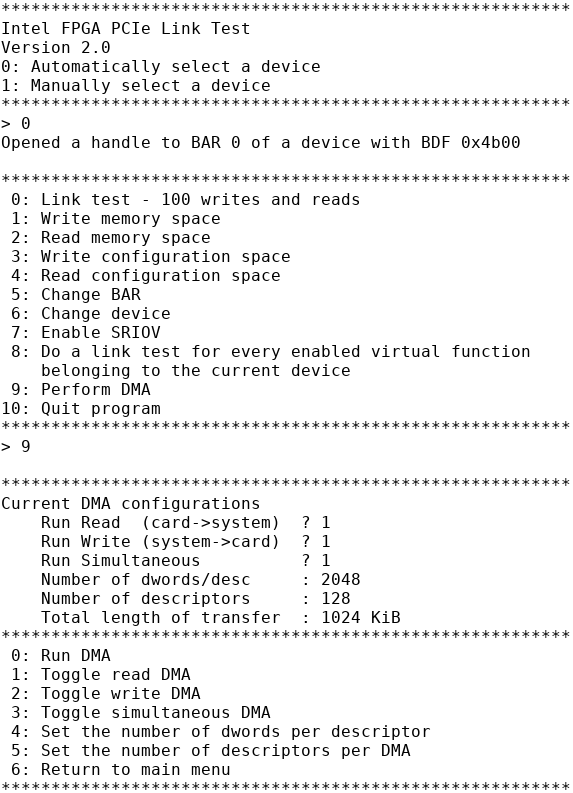
You can run the Intel FPGA IP PCIe link test in manual or automatic mode.- In automatic mode, the application automatically selects the device. The test selects the Intel® Stratix® 10 DX or Intel® Agilex™ PCIe device with the lowest BDF by matching the Vendor ID. The test also selects the lowest available BAR.
- In manual mode, the test queries you for the bus, device, and function number and BAR.
For the Intel® Stratix® 10 DX or Intel® Agilex™ Development Kit, you can determine the BDF by typing the following command:
$ lspci -d 1172
- For example, enter 0 to select Automatically select a device.
- Enter 9 to perform the DMA test.
- Enter 0 to run DMA. Then enter 0 again to run an infinite DMA loop test.
- The DMA test can be stopped by hitting the ESC key. Here is a sample transcript of the results:
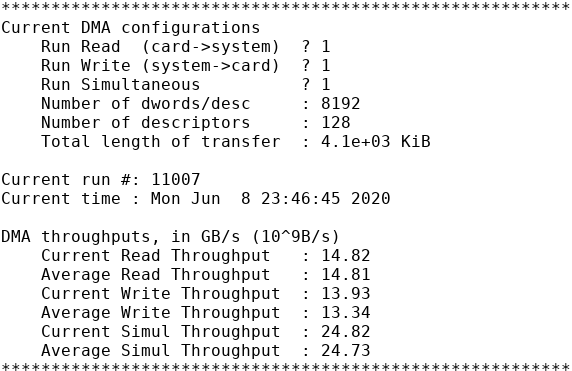 Note: The throughput numbers above are for a Gen3 x16 design example.
 - Enter 6 to return to the main menu.
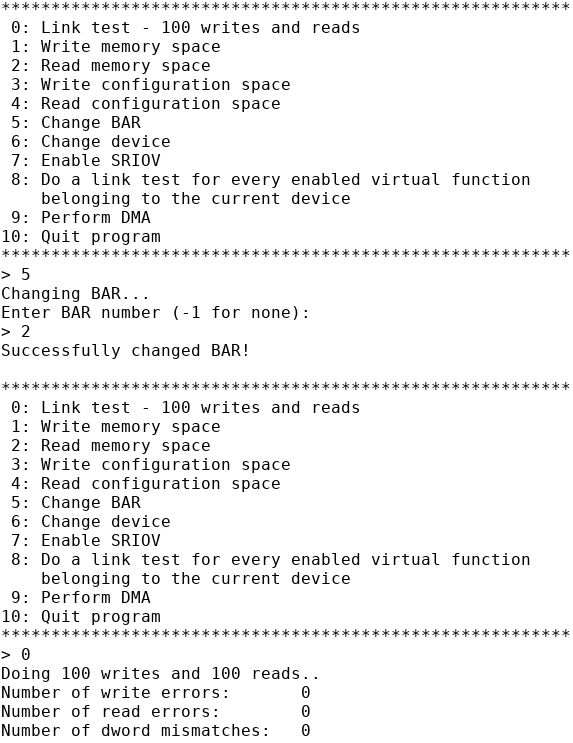
- Enter 5 to change the BAR. Then enter 2 to select BAR2.
- Enter 0 to start the Link test - 100 writes and reads.
- The results below show zero write and read error as well as zero Dword mismatch.
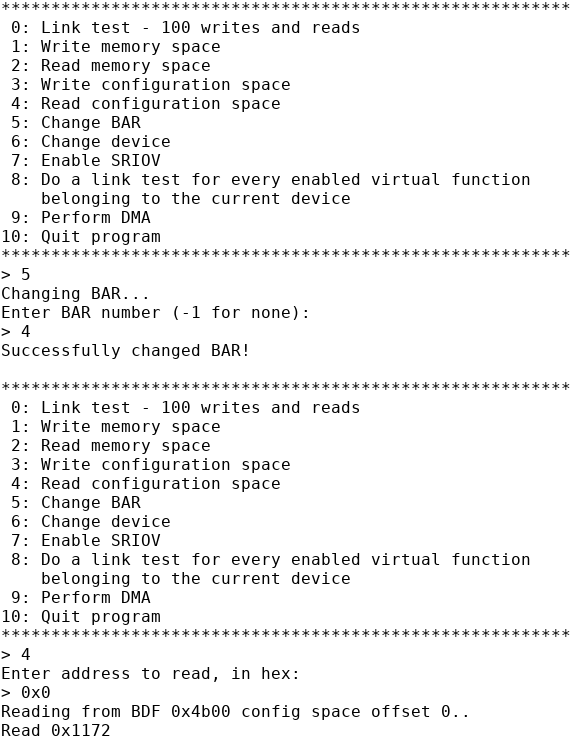
- Enter 5 to change the BAR. Then enter 4 to select BAR4.
- Enter 4 to Read the configuration space.
- Enter 0x0 to read out the Vendor ID.